
Learn to paint this realistic watercolour hydrangea in this step by step tutorial and time-lapse video. This painting was produced in Procreate, but the same method detailed below can be used in any digital art program or even with traditional watercolour painting.
Estimated reading time: 8 minutes
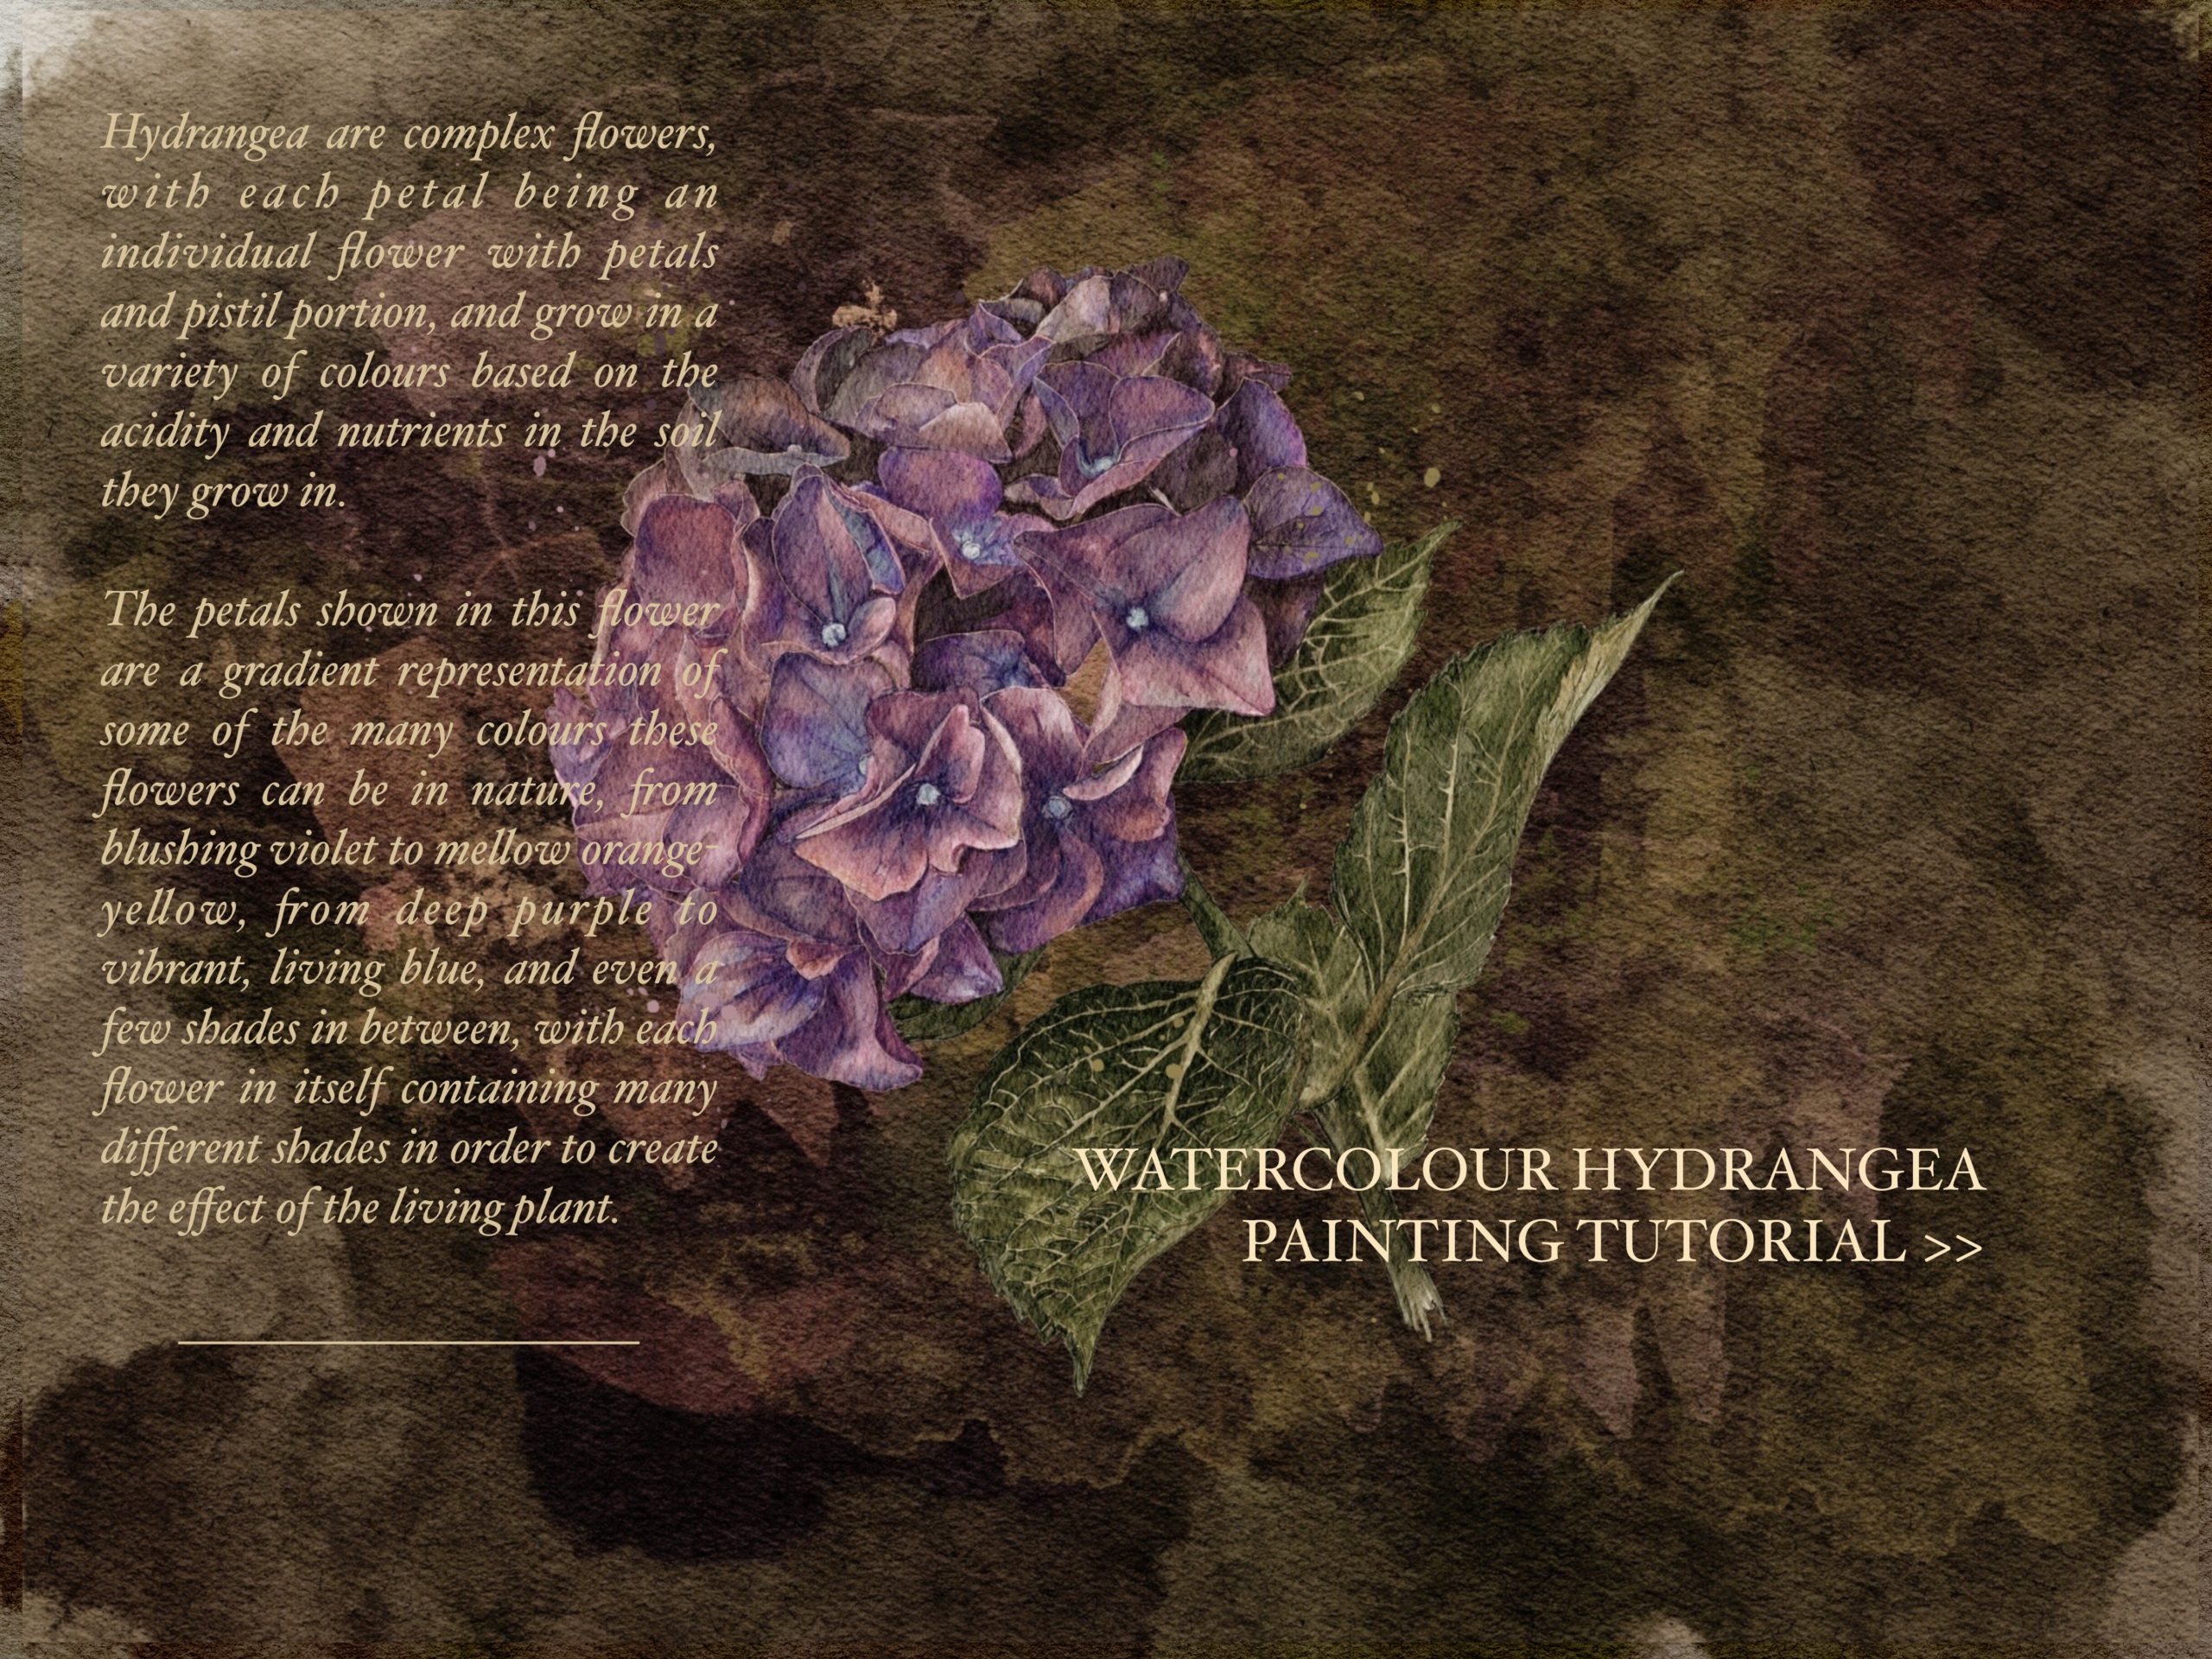
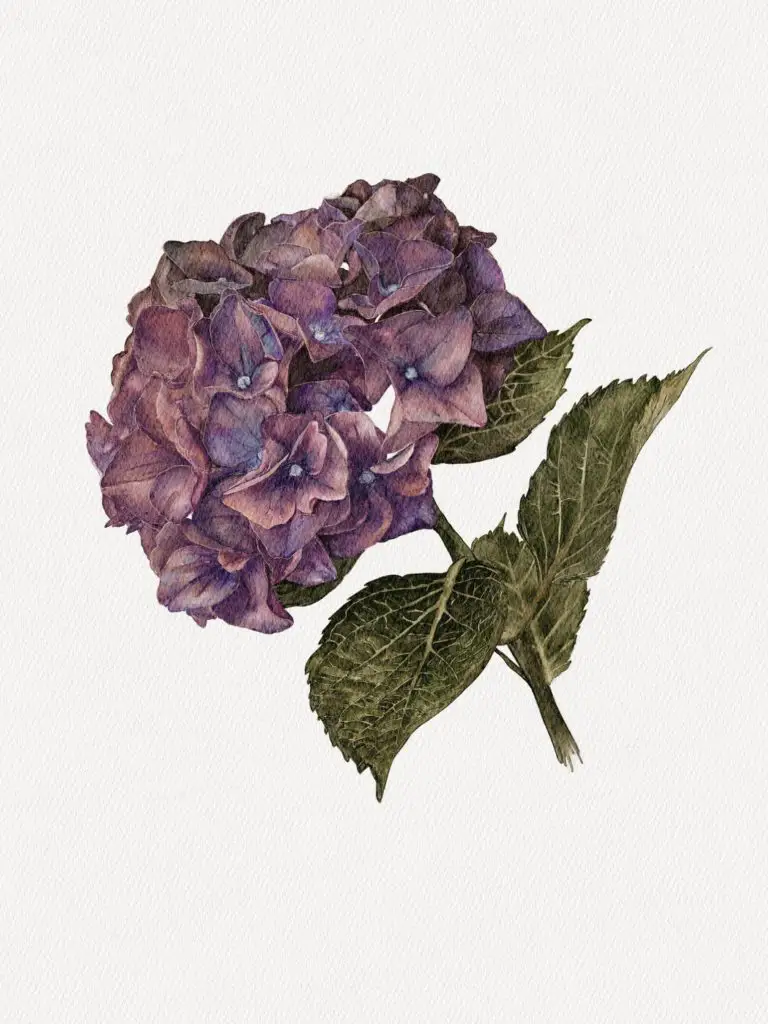
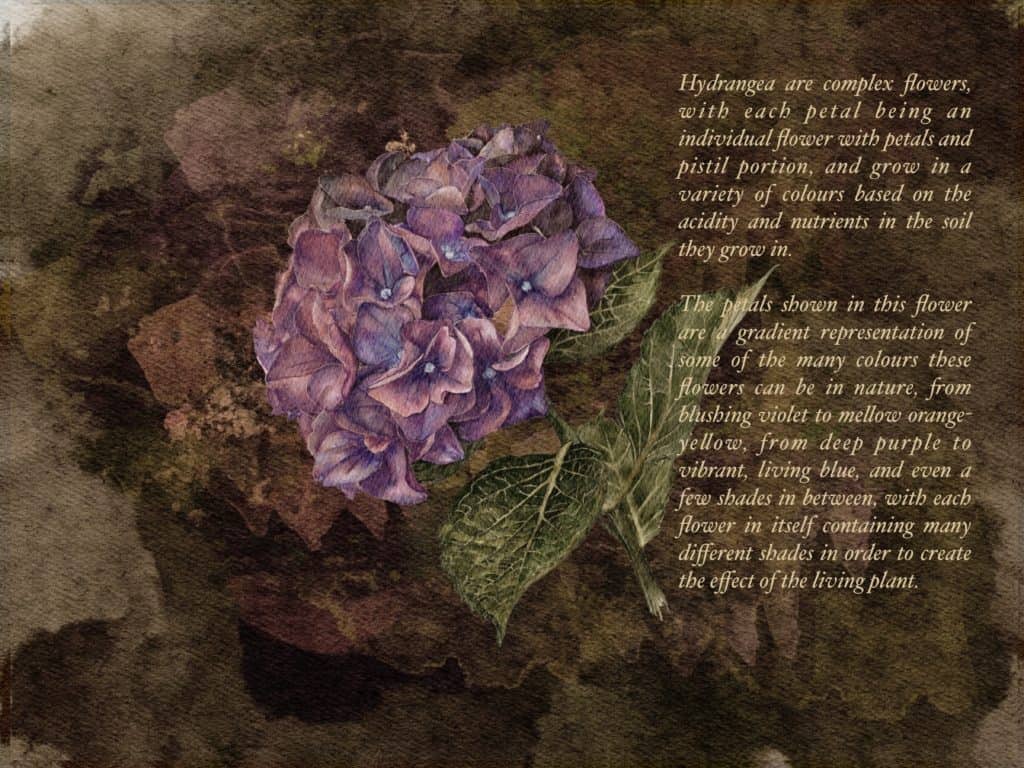
Hydrangea are complex flowers, with each petal being an individual flower with petals and pistil portion, and grow in a variety of colours based on the acidity and nutrients in the soil they grow in.
The petals shown in this watercolour hydrangea flower are a gradient representation of some of the many colours these flowers can be in nature, from blushing violet to mellow orange-yellow, from deep purple to vibrant, living blue, and even a few shades in between, with each flower in itself containing many different shades in order to create the effect of the living plant.
The faithfulness in this watercolour hydrangea rendition extends even to the veins and vessels of the petals, branching down the body of the leaves and spreading along with the various shades of blue, red, purple, and green in the flower’s surface. With the effect of pencil outlining and carefully-applied watercolour, these petals imparts a sense of delicate, nearly-translucent life, hinting artfully at the internal structures of the flower and the water and chlorophyll flowing within it.
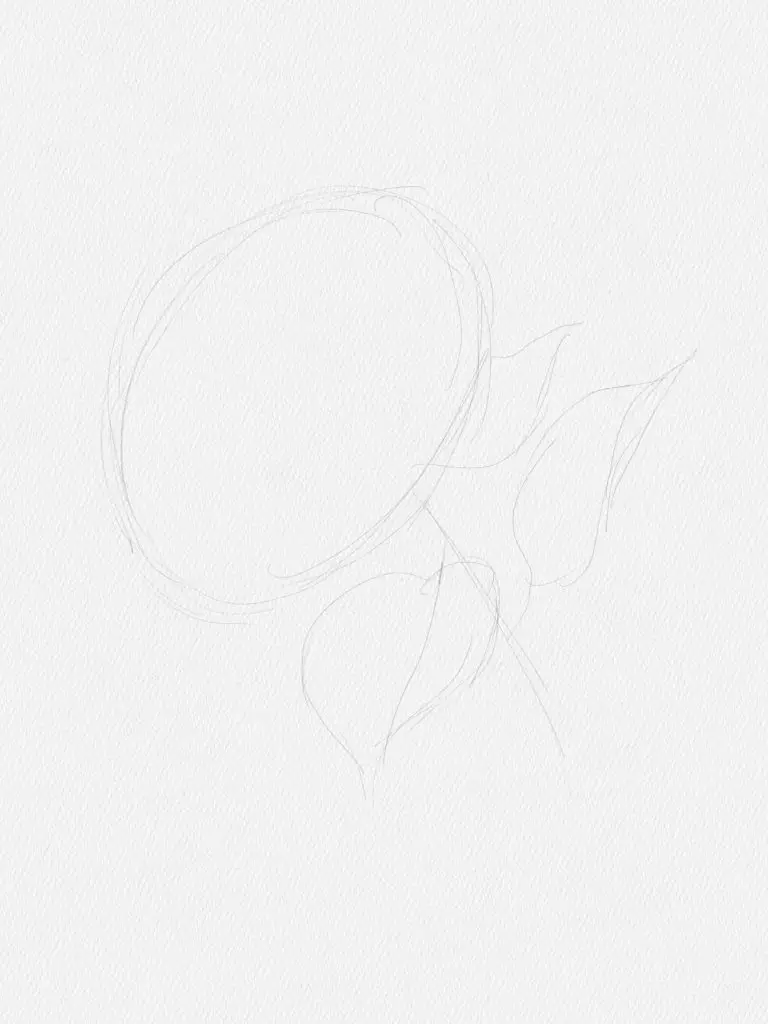
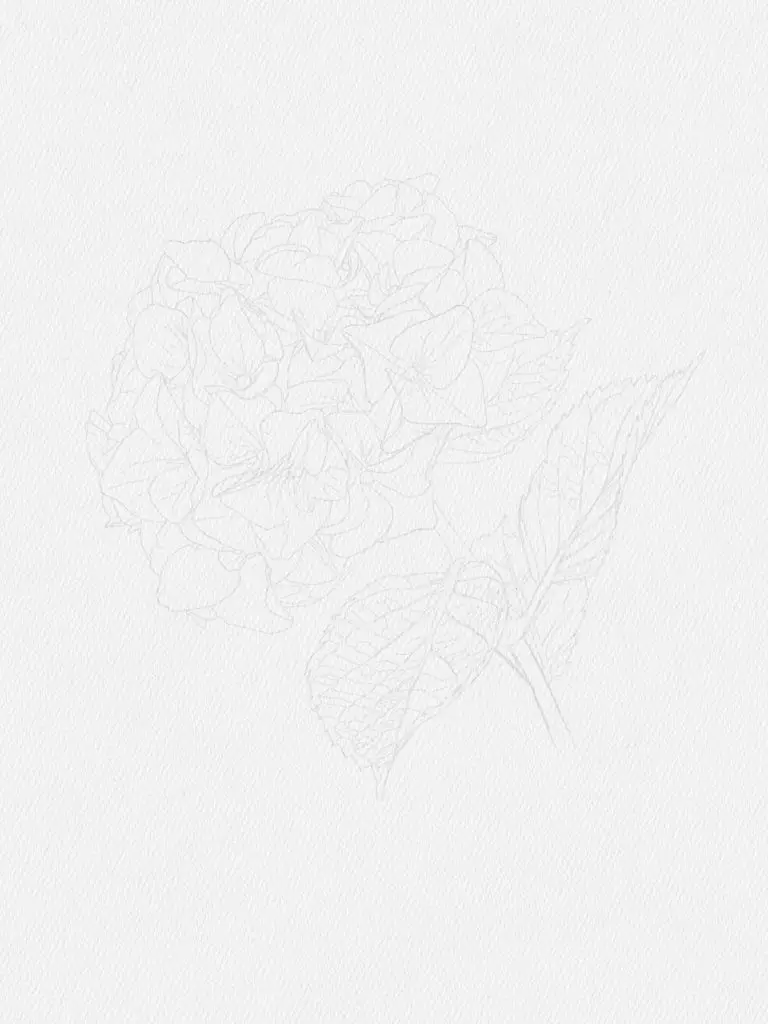
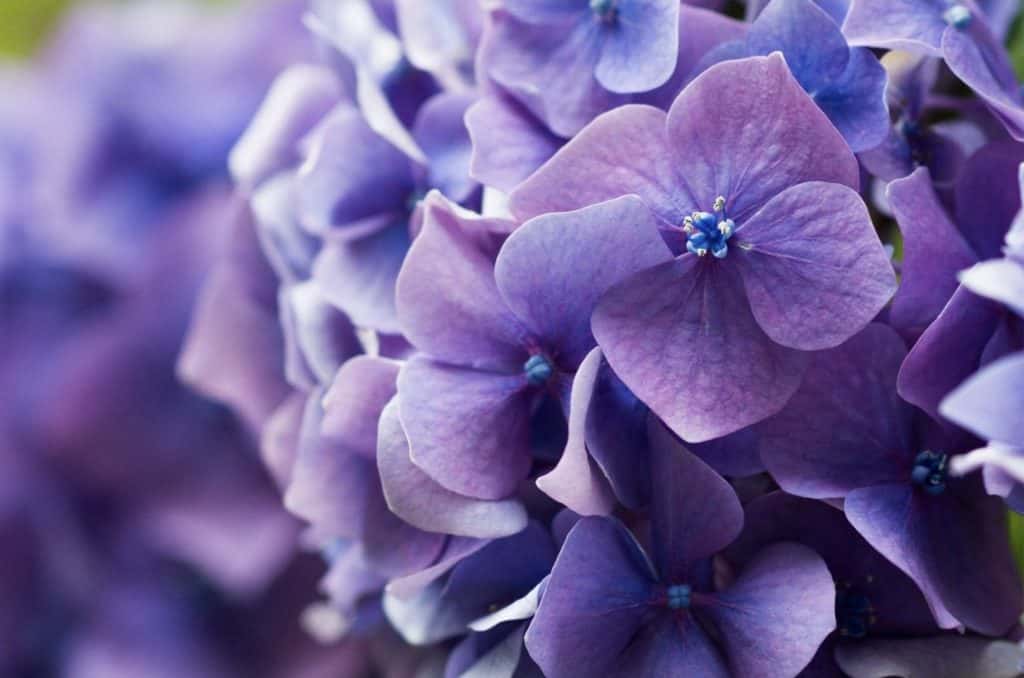
Begin your canvas with a sketch of the flower. Something to keep in mind when making the sketch is that, in hydrangea flowers, each flowerhead is made up of many smaller flowers, and are made up of two distinct types: showy, and non-showy. The non-showy flowers are set at the interior of the plant, without any petals, and the more colourful, leaf-bearing flowers surrounding the smaller flowers in a decorative ring, are set all the way to the outset of the flower. Since this structure is so unique to the hydrangea, it is important to retain it to the best of your ability when sketching the design of the flower, before putting down any colour.
Each individual showy flower contains four overlapping petals, which are shaped like spades, with a rounded triangular body pointed outwards. The smaller flowers, at the inner layer, are hardly visible, but are shaped like small pearls, and greatly resemble the same pearl-like interior of the larger flowers.
As for the leaves, they are located at the base of the petals as well as further down, with pointed ends like miniature teeth, and a symmetrical vein running down the middle.
Once you have a loose and workable design at hand, you can add deeper lines around the outline of the petals and the stem, with thinner pencil lines at the veins of the petals, running down the centre, and the branching structure in the body of the leaves.
Once you are satisfied with the sketch layer, you can begin carefully adding watercolour to the paper. Begin by painting the leaves, starting out at the darker, inner portions of the vein outline by laying down coats of dark, forestry green, with the inner leaf, where it attaches to the stem, being more brown and of a deeper green colour than the outer leaf, where it is a fainter green. Rather than painting all of the leaves at once, paint only the frame of the flower, to prevent the watercolour running down from the flowers.
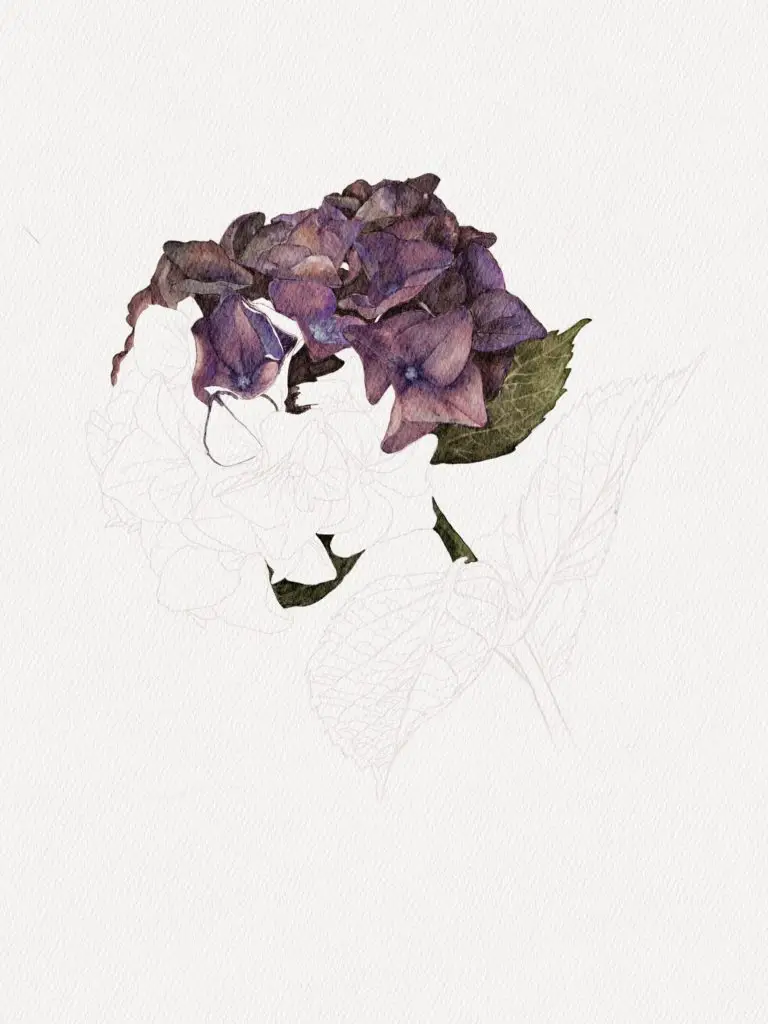
With that being done, move upwards to the crown of the flowerhead, beginning at the top of the painting by painting in small, careful brushstrokes, without too much paint at first. Much like painting the branching structures of the leaves, paint each petal of the flower separately to create distinct properties in the painting, even when viewed from afar, to maintain the recognisable structure of a hydrangea.
Layer in petals with purple and light brown brushstrokes, near black at the tips of the petals and light purple at the centre, and carefully blend as the two connect.
The outer petals of each flower in the flowerhead can be a light, purplish grey, especially as you paint the outset of the flower, as you are now, outlining the structure.
For the time being, leave the pearl at the centre of each flower unpainted, as they will be a much brighter colour than the rest of the flower, and should be left until the paint has dried on each individual flower on the flowerhead.
Moving along the top outer flowerhead, continue alternating and blending coats of brown, light brown, and purple, creating an outline of the top of the hydrangea flowerhead before continuing along the sides and further into the centre of the sketch.
As you continue to paint, you may alternate in the colour balance of each individual flower, especially those that face the viewer more directly. Some flowers – the aforementioned facing flowers in particular, should have fewer grey and brown, and more shades of deep purple and violet, some of them with inner layers of blue and light red to accentuate the brighter colours of the flowerhead.
While the hydrangea, viewed as a whole, looks like one distinct colour, each small flower in the flowerhead has its own balance of shades, which come together to create a complete whole. At this point, with the top of the flowerhead painted and the sides and bottom still only outlined, you can begin painting the inner flowers, moving adjacently so that you paint flowers that are connected to each other or overlapping. The larger flowers largely cover the smaller, circular bud flowers at the centre, so do not worry about painting them until you begin painting the centre peal at the middle of each flower.
As you paint, remember that, even as spaces become more filled, each petal should be painted individually, as to retain the fidelity of the sketch as it becomes covered in pigment.
Filling out the sketch one by one, start adding whiter purples at the centre of the flowers that are fully turned to the viewer, in preparation for the bud at the centre of each individual flower of the flowerhead. This bud will be painted in tones of silver and light purple, striking a balance with the darker brown shades of each flower in the structure and coming across as small points of light in the painting.
You may paint the smaller, interior flowers a similar colour if they are shown, but it is possible that they will be very fine details in the final painting.
Moving down to the lower parts of the flowerhead, these flowers are less brown and more pink, with the darker purple acting as the inner veins of each petal, and the petals themselves going from a deep, natural pink, to a delicate violet at the centre, still retaining that silvery pearl.
Once you have painted each individual flower, you can then add the pearl at the centre, shading to accentuate the fact that it is a miniscule sphere, rather than a flat circle.
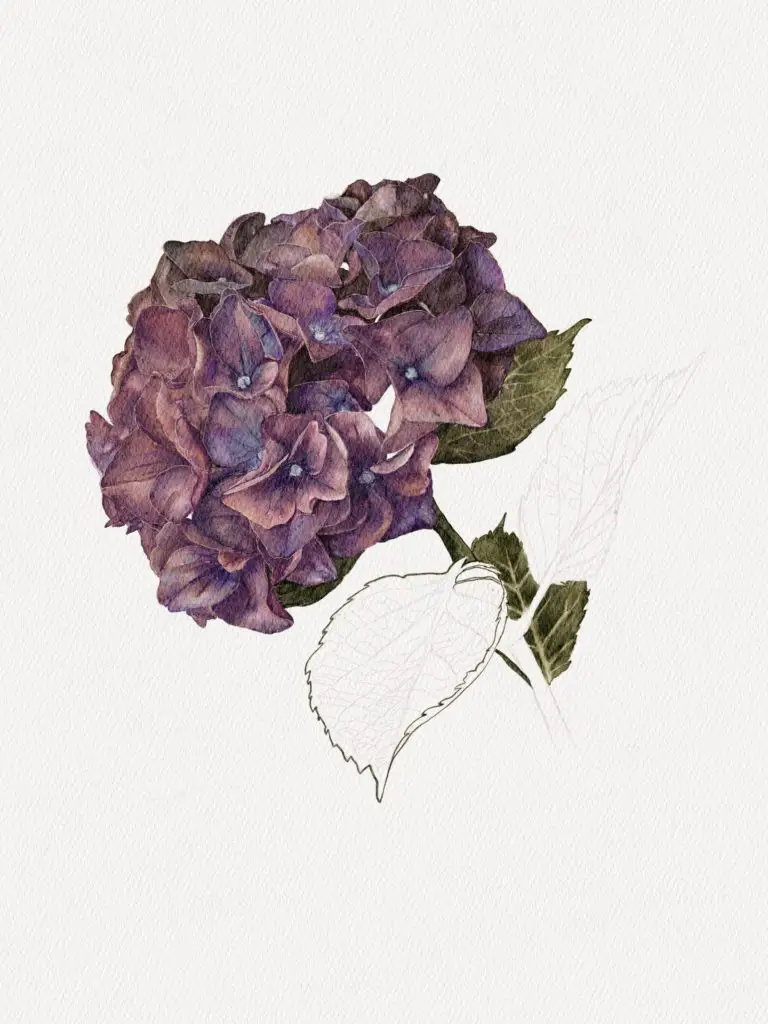
Then, moving even further down, outline the veins of the leaves of the stem, and continue painting the stem a deep green with brown undertones. The base of the leaves should be a similar dark green, with the inner veins that you so carefully outlined left mostly at the colour of the paper, with some light greens and beige brushstrokes, moving very carefully to not smear the delicate brushwork you spent so much time on.
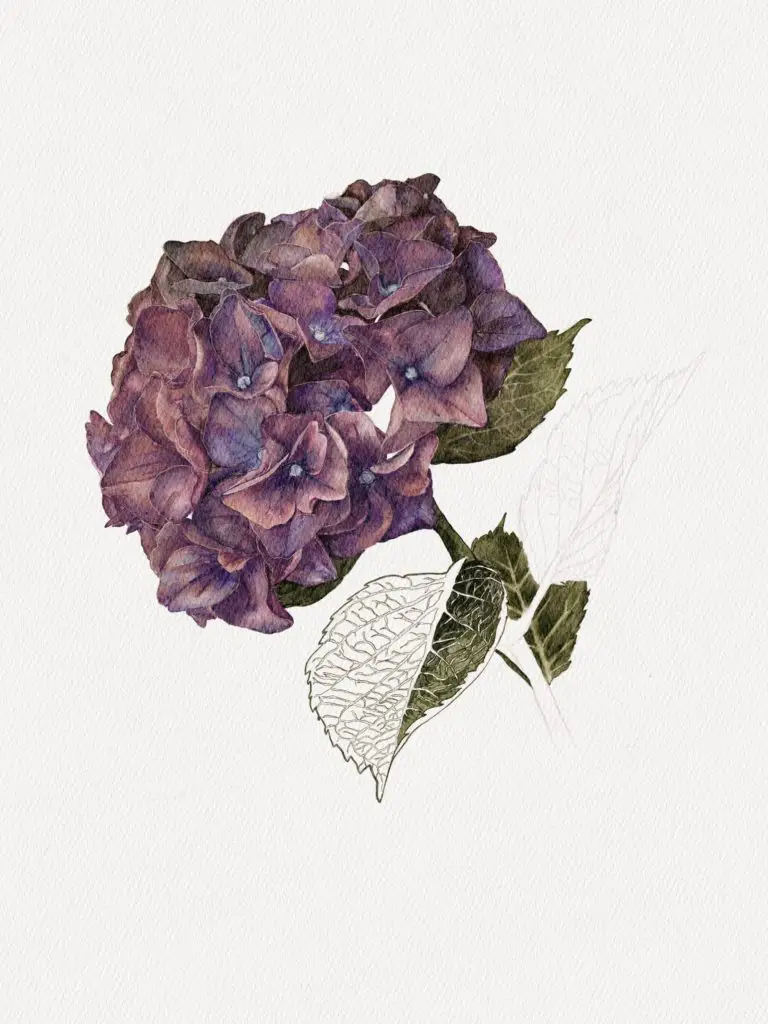
Finally, with the entire flower painted, add fine details with a small brush, and blend the harsher areas of color contrast, and you should be left with a blooming, beautiful hydrangea.
tools & resources
- Procreate Realistic Watercolour Brush & Canvas Set: https://creativemarket.com/Jazwinska/4696269-Realistic-Procreate-Watercolor-Kit
- Printable Hydrangea Flower Drawing Outline: (coming soon)
- Printable Hydrangea Painting: (coming soon)
- High Quality Hydrangea Painting Prints (A4, A3 & A2): (coming soon)