The natural world has given us so many ways to create a beautiful piece of art, but one of my favourites is through the use of light and shadow. It is such a creative way to show depth in your painting, and amazingly enough, it can be achieved through the muted colours of pink and peach.
This step-by-step watercolour painting tutorial will guide you through the process of creating a beautiful peach rose, from start to finish. I will even show you some cool features that are included in Procreate such as the use of brushes and layers. So, if you’re a beginner or somehow lost on where to start, I hope you enjoy it and find this useful.
What is Procreate?
First and foremost, let me introduce you to Procreate. Procreate is an amazing app that can be downloaded onto your iPad. It’s user-friendly and it has so many features that make painting very similar to the traditional way, except using this app is much cleaner because you don’t have to use the actual paint, and “artistic mess” could be easily cleaned with a simple tap of your finger.
There are a lot of painting apps available on the App Store, but I find that Procreate is definitely one of the easiest and most user-friendly ones to use. It’s also packed with features, yet it’s still very affordable compared to other apps.
To download Procreate, simply go to the App Store and type in “Procreate.” The app will come up and you can click on the “Get” button to download it. Once it’s downloaded, you will be able to open it and start your painting journey.
Procreate Features
The multiple features of Procreate will be very useful for this painting tutorial. For starters, here are some of the important tools that I’ll be using in this tutorial:
Brushes
Procreate comes with various types of default brushes with different textures necessary for each stroke. Nevertheless, you can also download custom brushes that better fit your needs. There are various websites and blogs dedicated to providing custom Procreate brushes, many of which are free to download. For this painting tutorial, I used the detailed watercolour brush from an artist on Creative Market. I have tried several watercolour brushes and this has been my favourite one so far.
Layers
This is a feature that allows you to separate parts of your painting so that you can work on them individually. It’s really useful when adding details or making changes to your painting without affecting the other areas.
If you’re familiar with Photoshop, then you’ll understand the concept of layers quickly. If not, think of it this way: each layer is like a piece of paper that you can draw on, and they’re all placed on top of each other. You can turn the visibility of each layer on or off, so you can work on one thing at a time without affecting anything else.
You can also change the order of the layers, so if you want the background to be on the bottom and the foreground to be on the top, you can easily rearrange them.
So, for example, you can have a sketch layer, then painting layer, then shadow layer, etc.
Clipping Masks
A clipping mask is basically a layer that is clipped onto another layer. This means that whatever is painted on the clipping mask will only be visible within the area of the layer it’s clipped onto.
Blend Modes
There are different types of blend modes that control how the layers are blended. It includes options like Normal, Multiply, Overlay and Screen. You can change the blend mode of each layer to get different effects. For example, if you want a dark background with a light foreground, you could use the multiply blend mode on the background and overlay on the foreground.
Transform
This feature allows you to resize, rotate or move your painting around. It can be really handy if you want to change the composition of your painting or if you want to add more elements.
Pressure and Opacity
The ability to control the pressure and opacity of each brushstroke is also two great features of Procreate. This is especially helpful when trying to create delicate strokes or adding depth and realism to your painting.
Okay, now that we’ve got the basics down, let’s start!
Watercolour Painting Of A Peach Rose
I will be using a picture of a peach rose from my garden as my reference for this tutorial. If you’re using your reference, make sure to have it handy so you can follow along.
Open up Procreate on your iPad (or other Apple device). If this is your first time using the app, you will be prompted to create a new document.
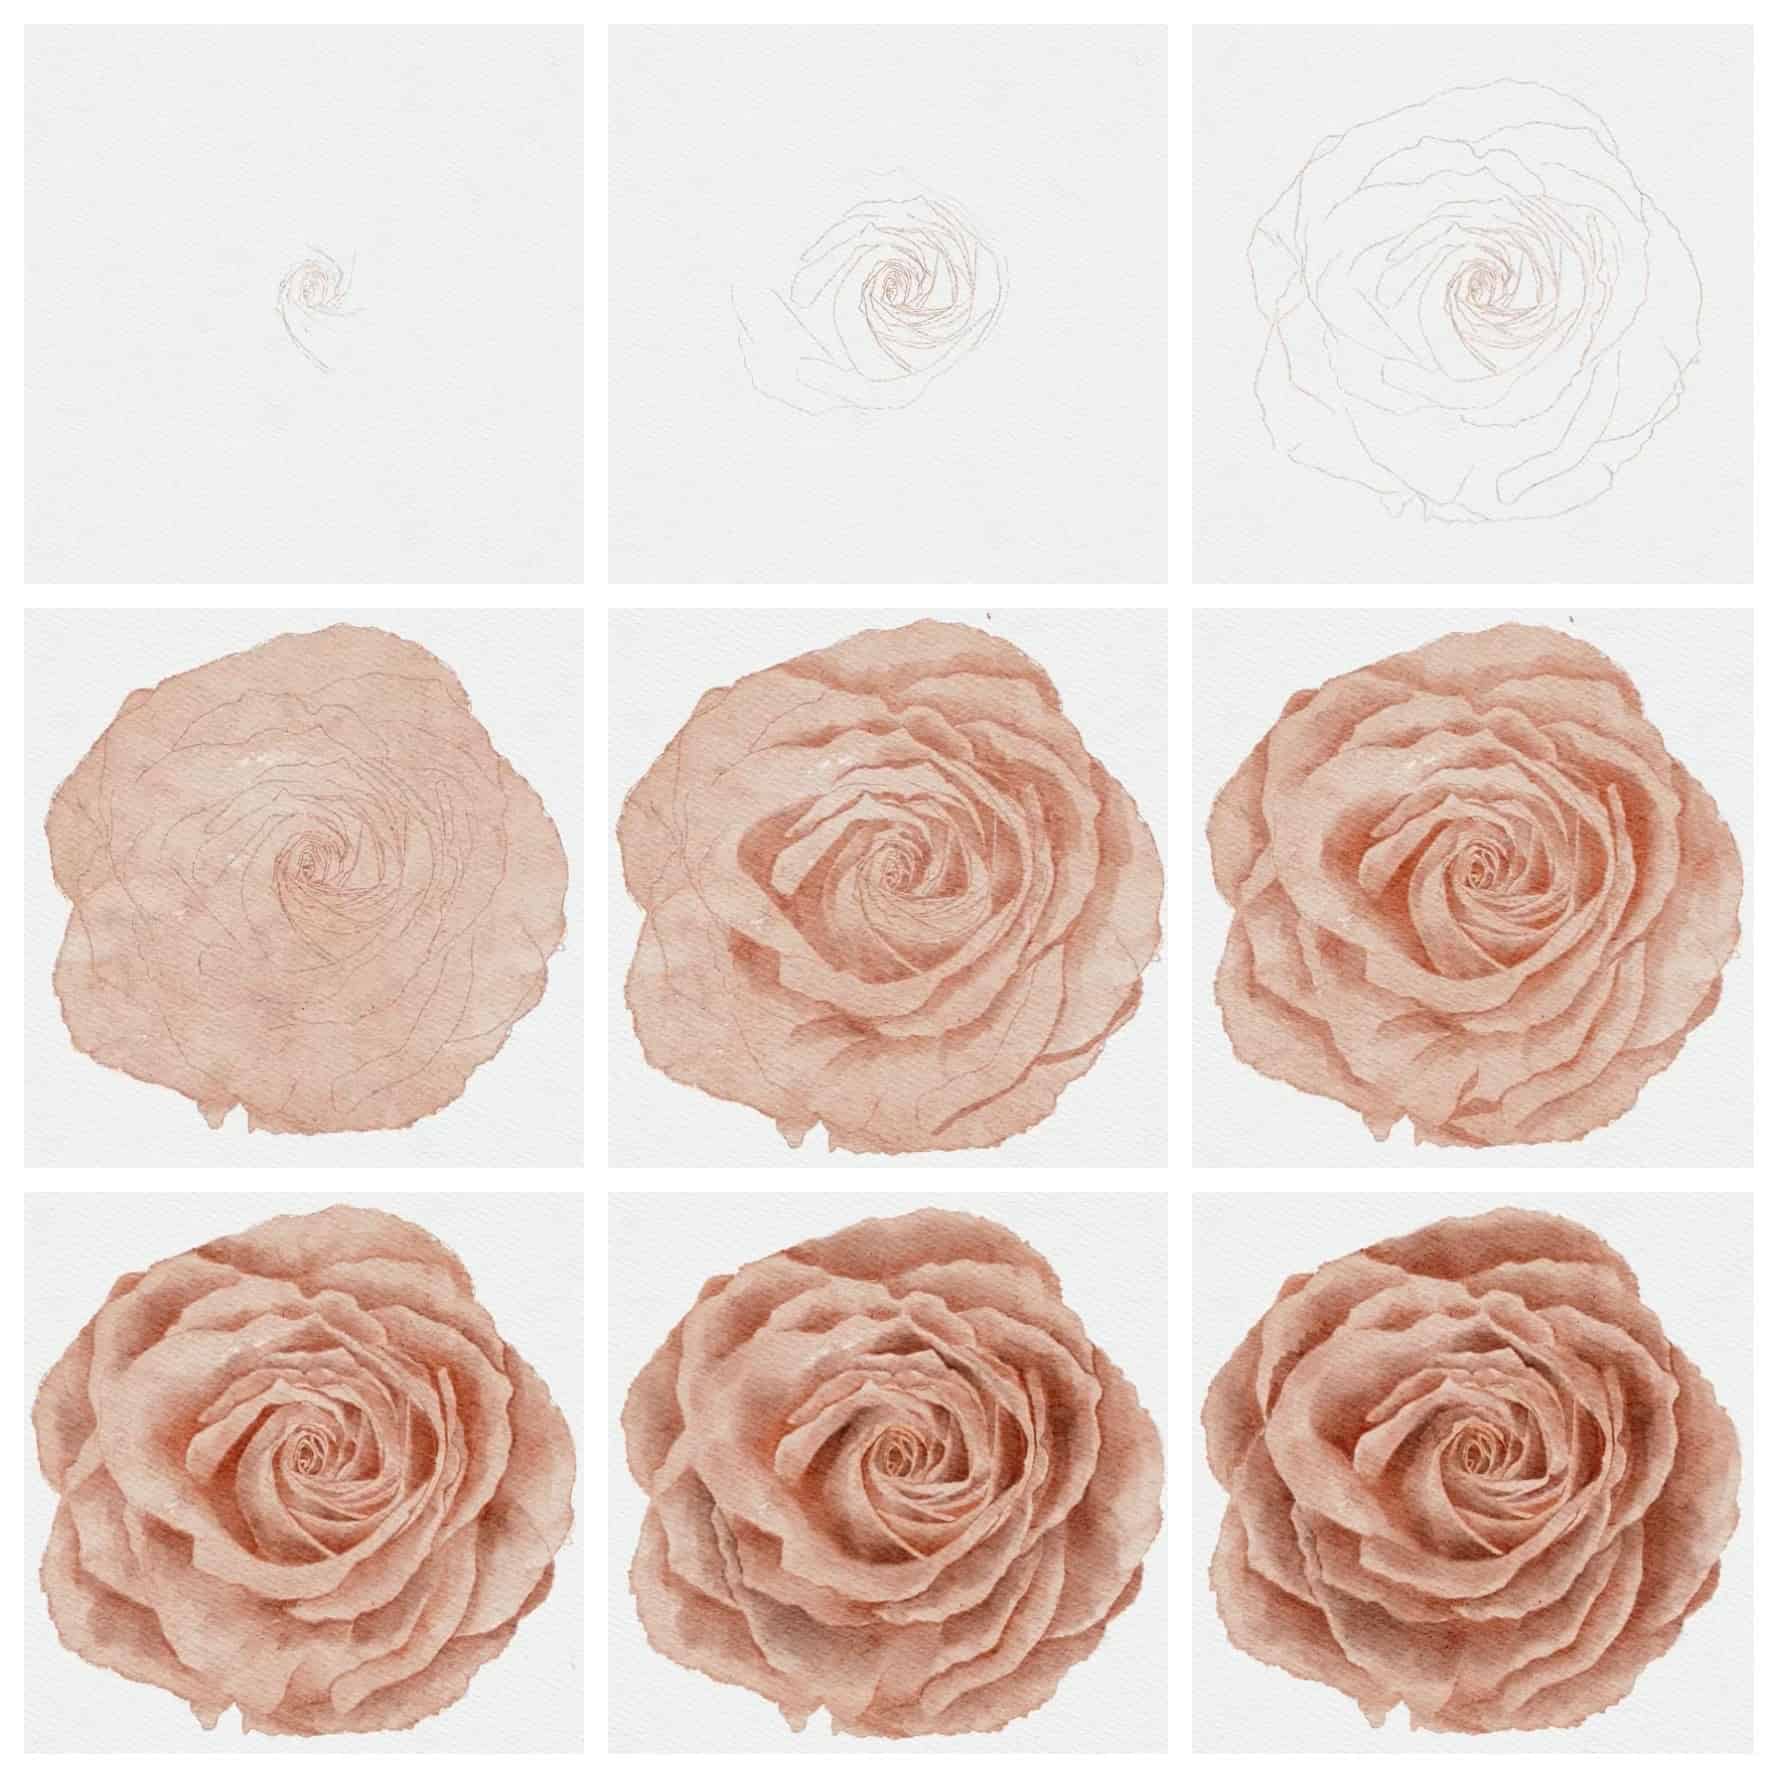
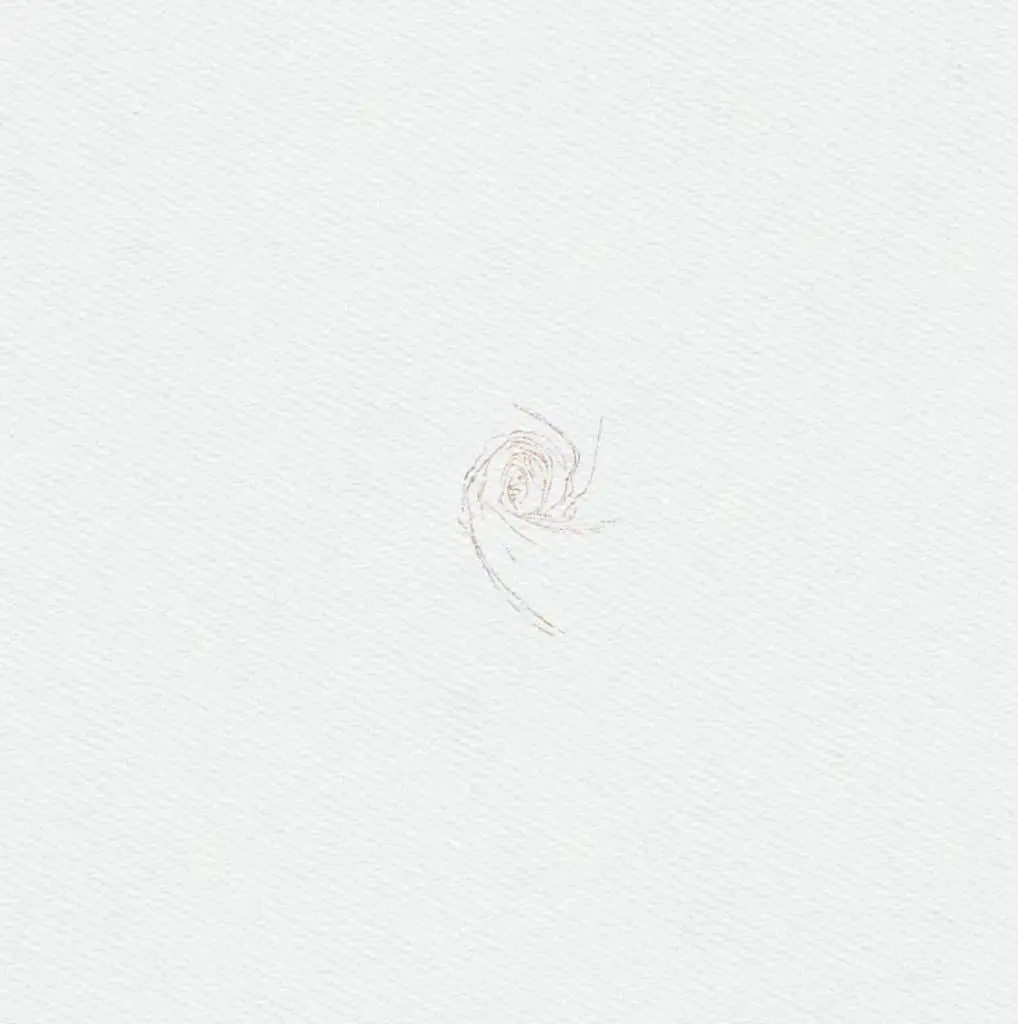
Next, we’ll create a new layer by tapping on the plus icon at the bottom of the Layers panel. This will create a new blank layer that we can work on. Name the layer “Outline”
There are many different brushes to choose from, but for this tutorial, we’ll be using the watercolour brush that I purchased from Creative Market. You can adjust its size and hardness by tapping on the brush icon and sliding the arrows. Once you’ve chosen your brush, choose your colours from your palette. I’m using a blush/peach for the petals of the rose.
Let’s start painting!
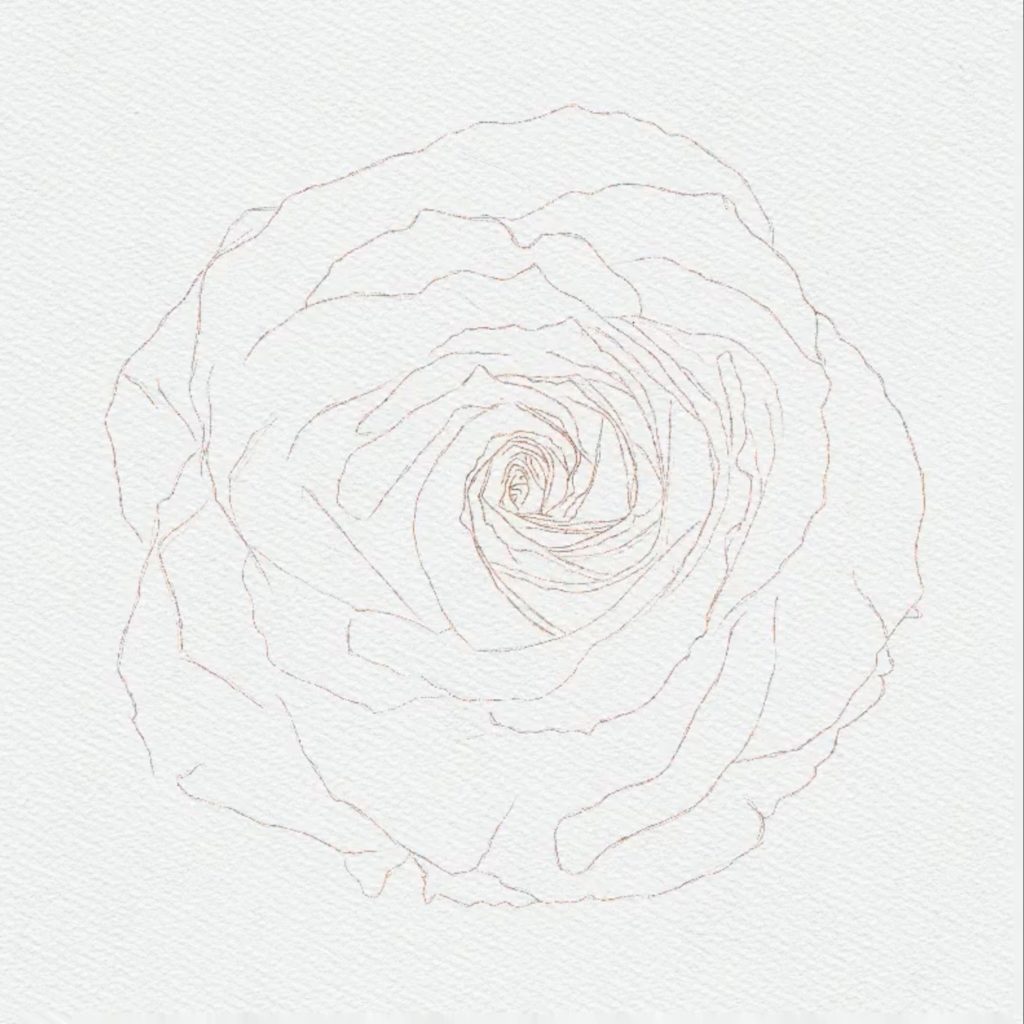
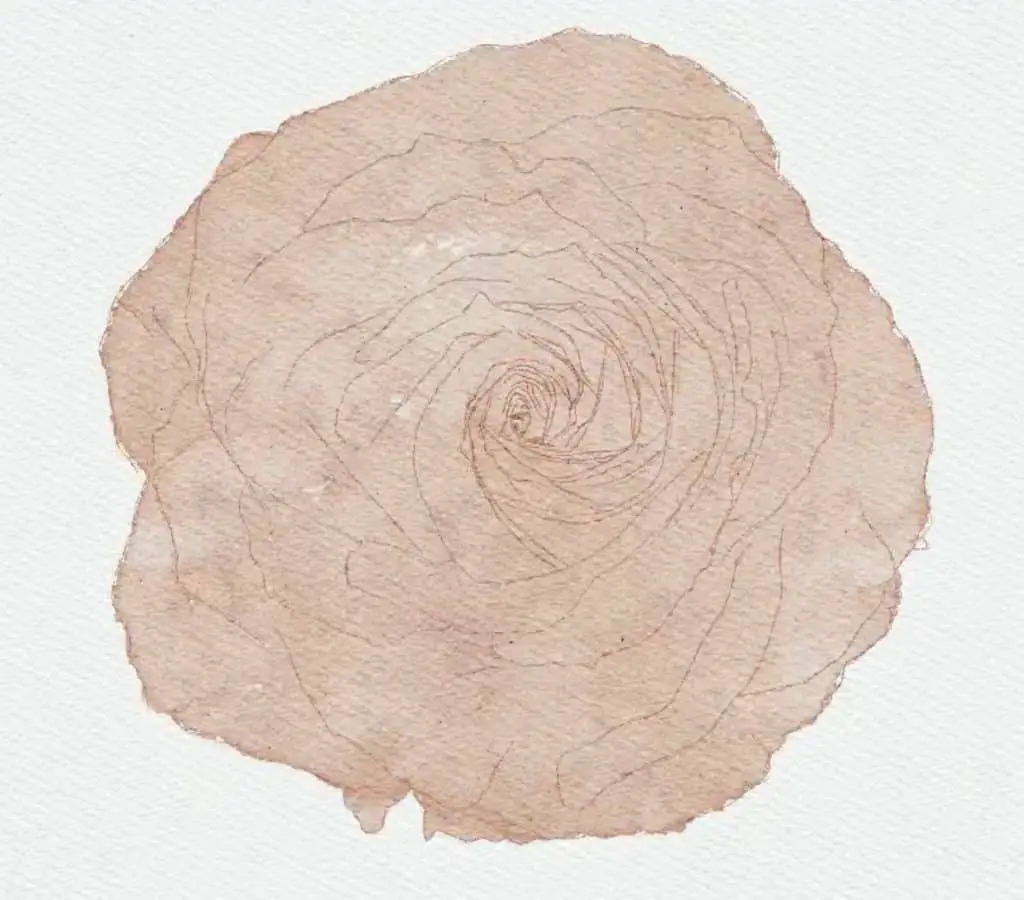
Now that we have the outline of our rose, we can start adding some colour. Make a new layer and name it something like “Base Colour”, then put the Outline Layer above the Base Colour layer. Start colouring the inner edges of the outline until you make an enclosed space.
You can use a water blender brush and blend up some hard edges to achieve the desired texture. Make sure to paint over the entire petal, and not just the edges. Repeat this step for all of the petals. You can also use the eraser tool to create a more defined edge.
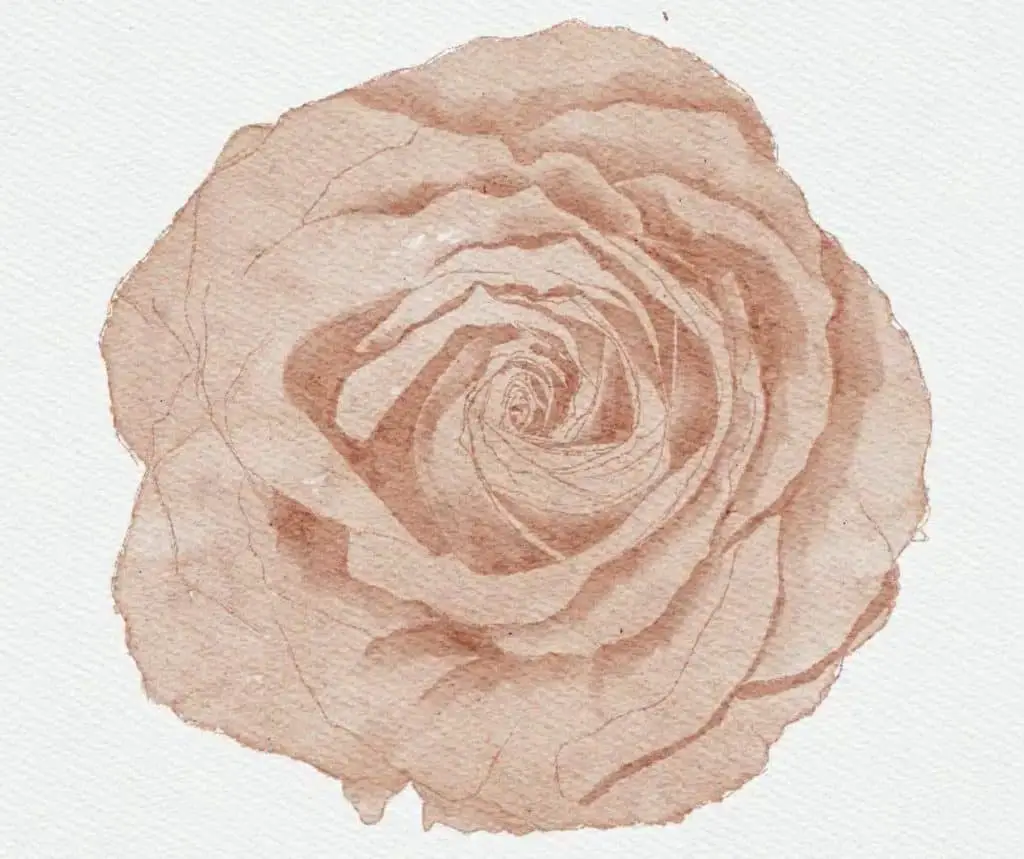
Next, we’ll add shadows to the petals. This takes a bit of practice, but the key idea here is to have a solid understanding of where and how the light is hitting the rose. Shadows represent the deeper parts of the rose. Areas that have little light because it is either far from the light source or covered by other elements.
Create a new layer and name it “Shadows”, it should be above the Base Colour Layer. For this example, the inner part of the rose is the darkest area since it is the most covered area.
Shadowing helps avoid making the rose look flat. I start with lighter brushstrokes when adding shadows to the petals then get darker. Repetition is key when it comes to adding shadows. The more you paint, the darker and more defined the shadows will become, but you will also need to choose darker shades. The darker the shadow, the deeper it looks. Keep adding strokes until you see a bit of a definition on the petals.
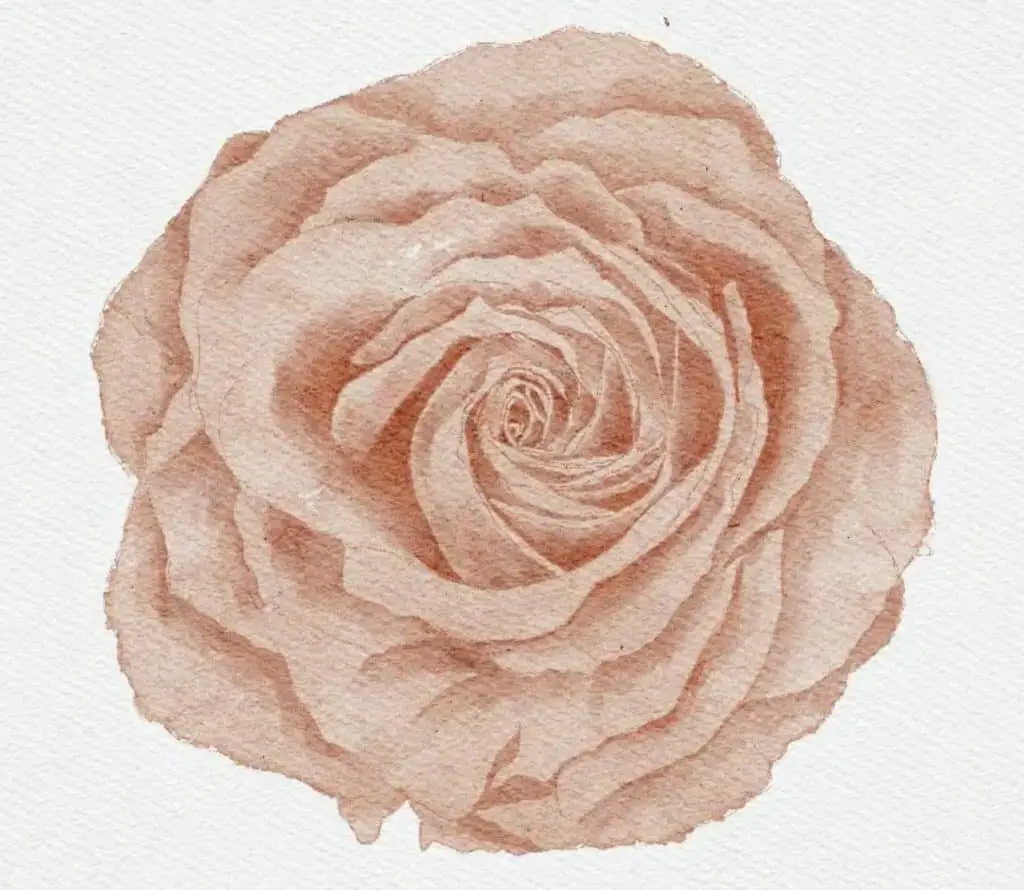
Repeat this process for all of the petals until you’re satisfied with the final details. Once you’re done with your initial shading, you can now start adding the final details to our rose.
Now that we’ve finished adding colour and shading to our rose, it’s time to clean up any rough edges or unwanted strokes.
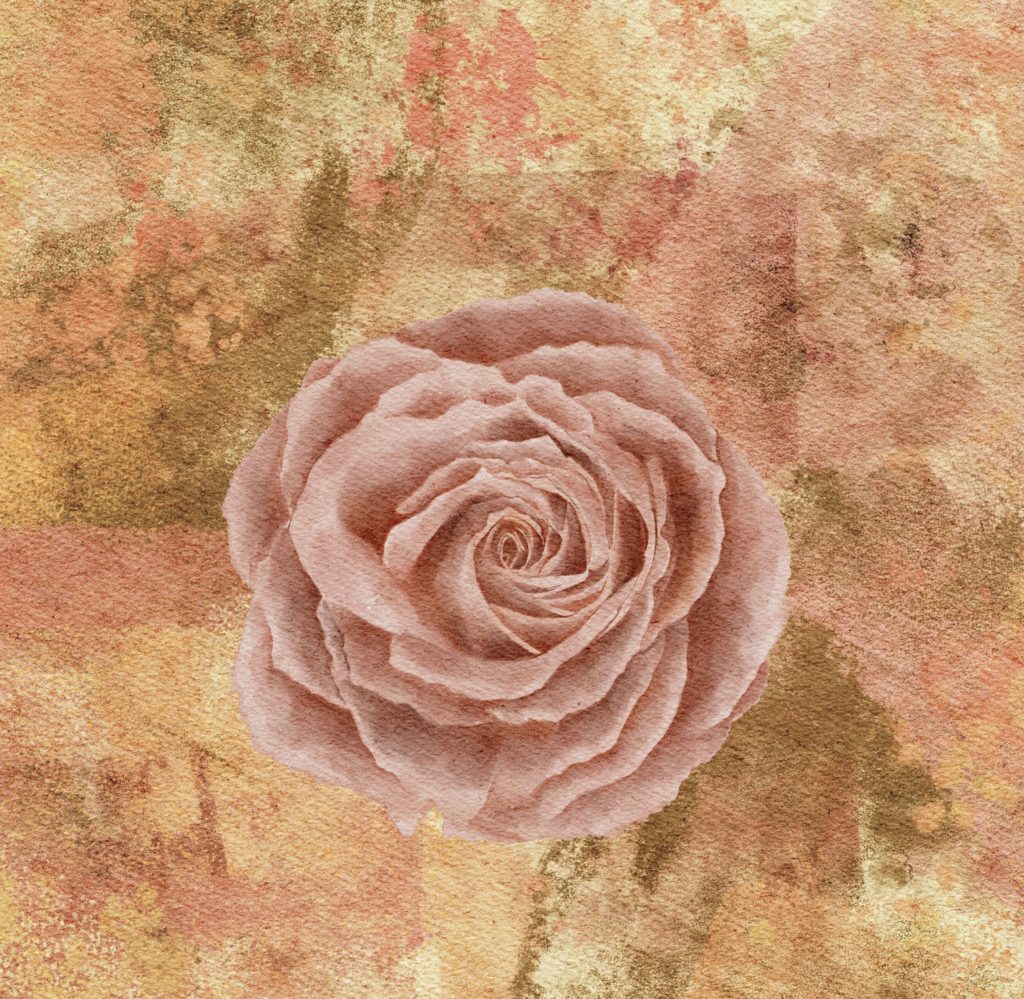
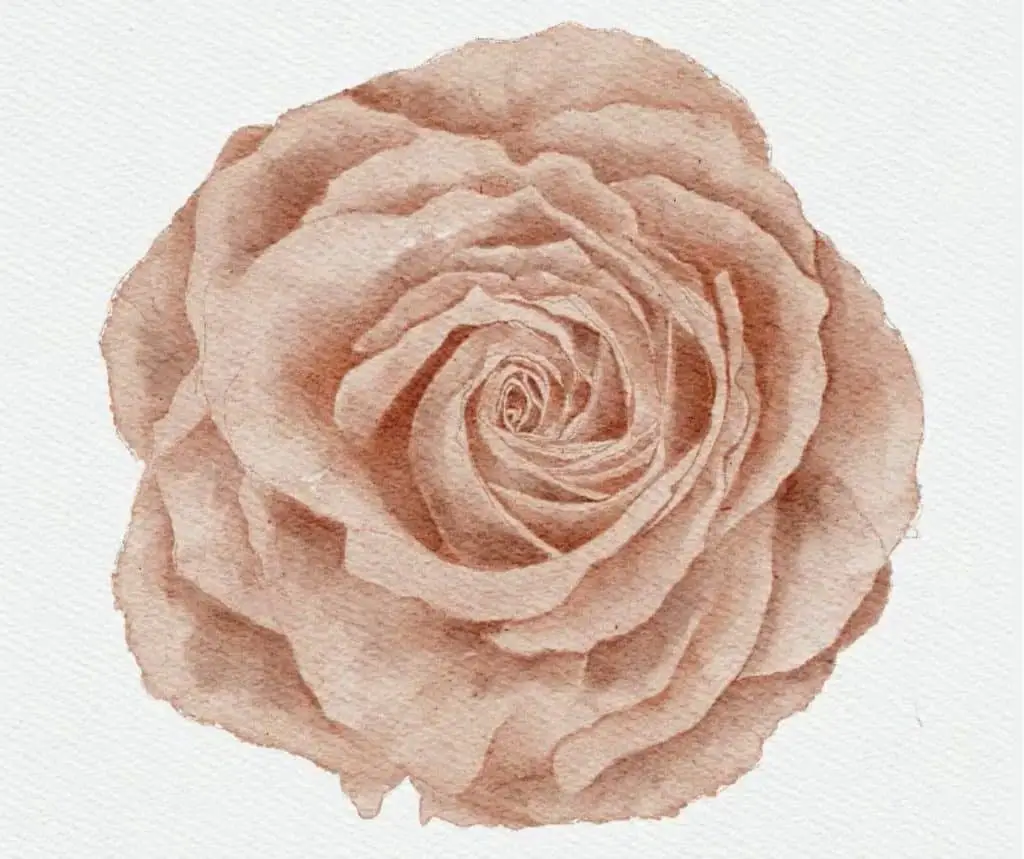
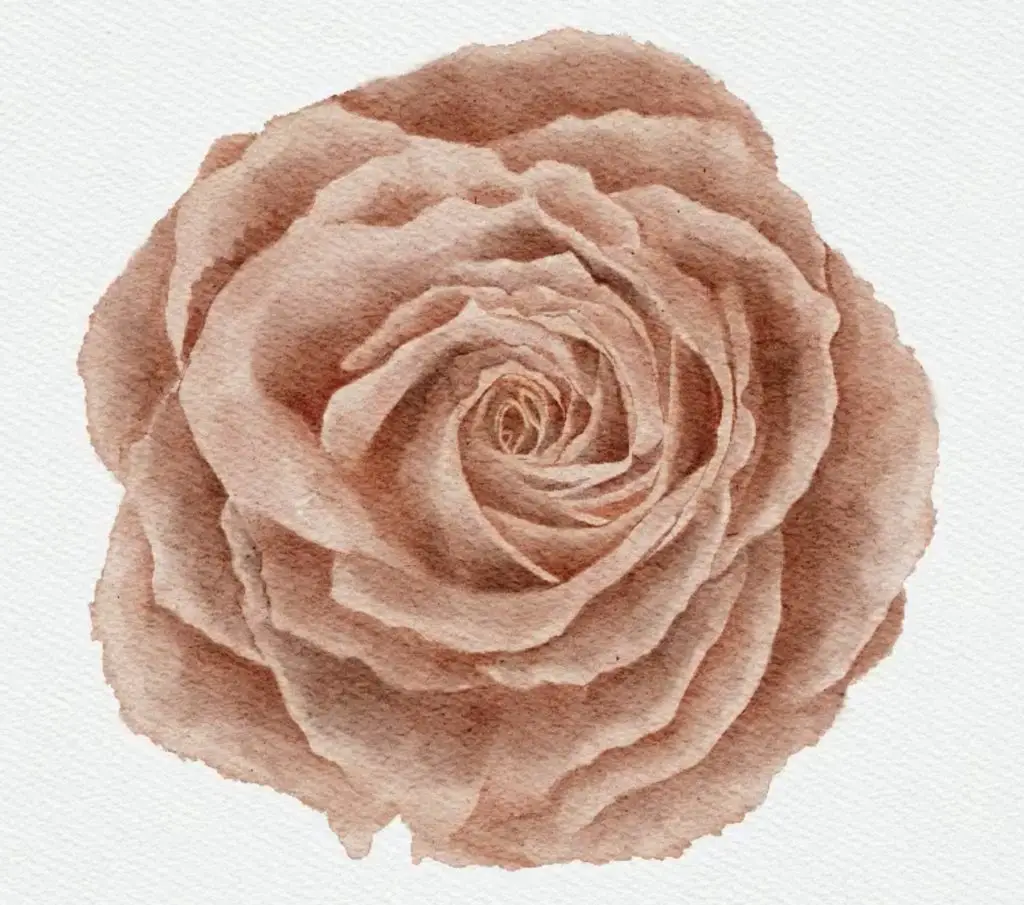
And we’re done! Our final artwork should look something like this. Feel free to experiment with other colours to create your own unique watercolour painting. Practice makes perfect and this tutorial will help you start somewhere.
Here are a few things to remember when painting with watercolours in Procreate:
- Always use a light touch when painting, especially when adding shadows and highlights.
- Understand where the light is hitting the object to determine where to place the shadows and highlights.
- Make sure to blend colors well to create a natural look.
One of the best things about Procreate is the convenience – it’s so easy and accessible. You can create a beautiful watercolour rose, or anything else for that matter, even with your mobile device. The steps are simple: outline until you make an enclosed space, pick a colour and fill it in, add shading or highlights, then use the eraser to clean up any rough edges. And that’s all there is to it!