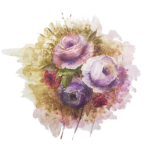
Painting roses in Procreate in the style of oil paints can be a simple process, and not too different to the traditional form of oil painting. Roses are made up of simple geometric shapes, arranged in repeating patterns and depicted with enough variety and difference from layer to layer to still come across as natural and appealing to the eye. By following this simple guide, you should be able to paint roses in Procreate in such a way that’ll look artistic and natural, while maintaining the appearance of oil painting.

Tools:
- Procreate app and Pencil
- Oil Painting Brush. For this artwork, I purchased this brush from Creative Market (but you may use your own set): https://creativemarket.com/Ldarro/6441075-Perfect-OILS-87-brushes-4PROCREATE
Painting Tutorial
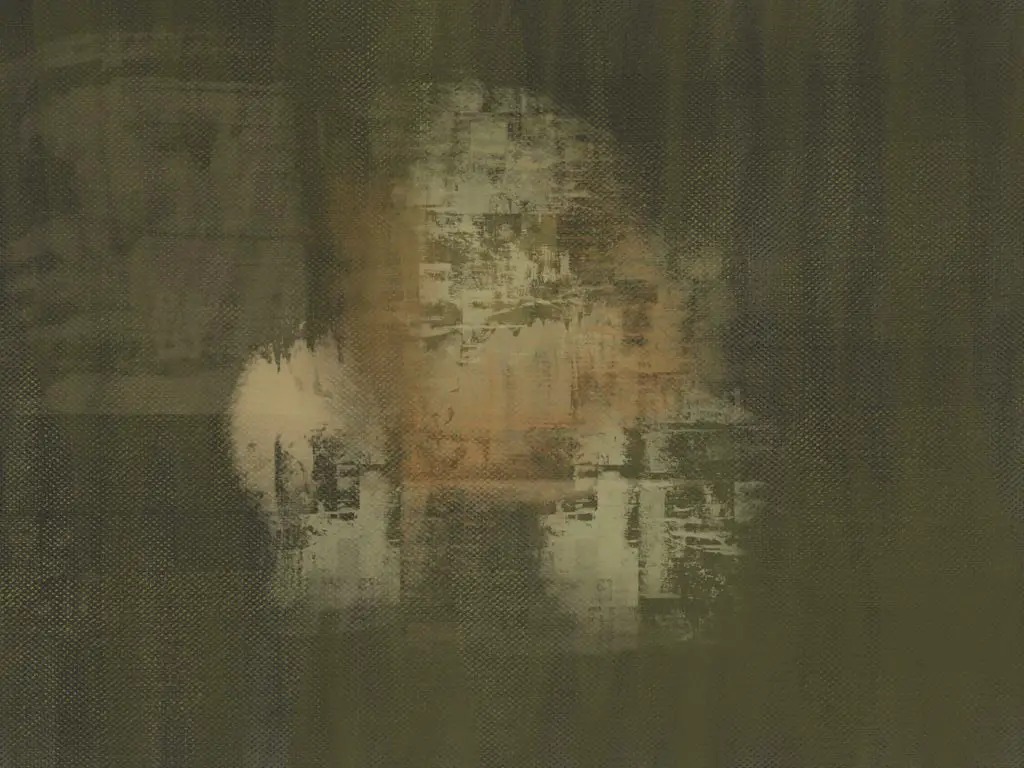
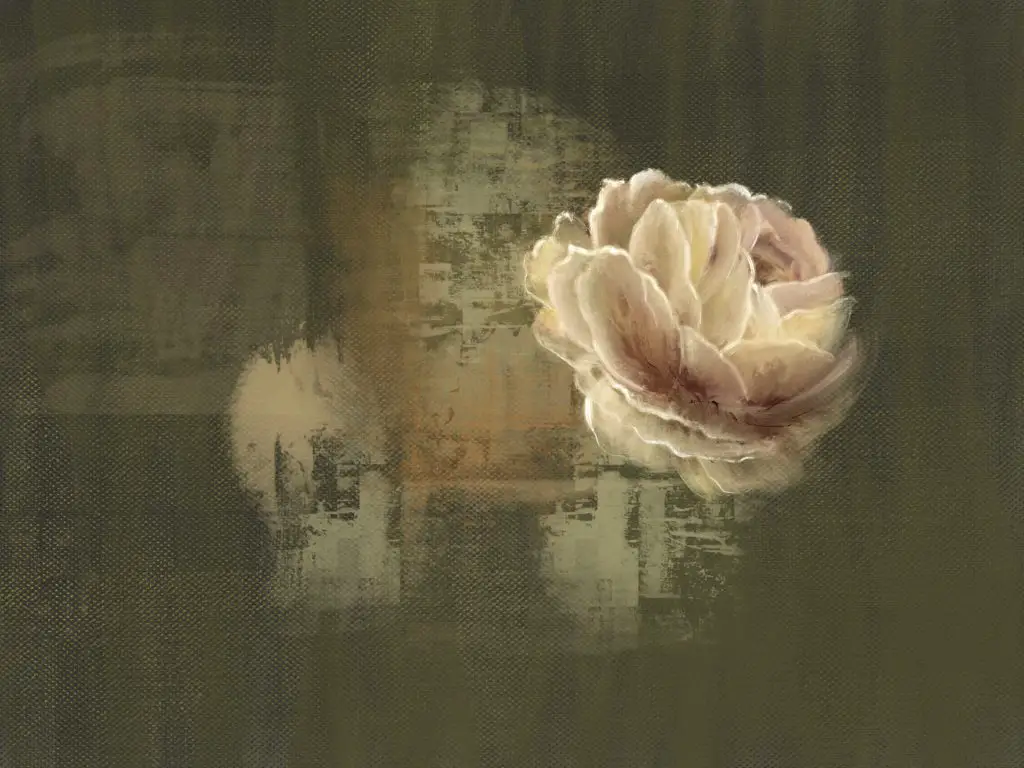
To begin, start by laying out a few light, translucent blotches of colour around where you want the largest of your blooms and leaves to be. Oil painting depends largely on the construction of numerous layers of colours that come together to create a whole and lush image, and this is no different with digital oil painting.
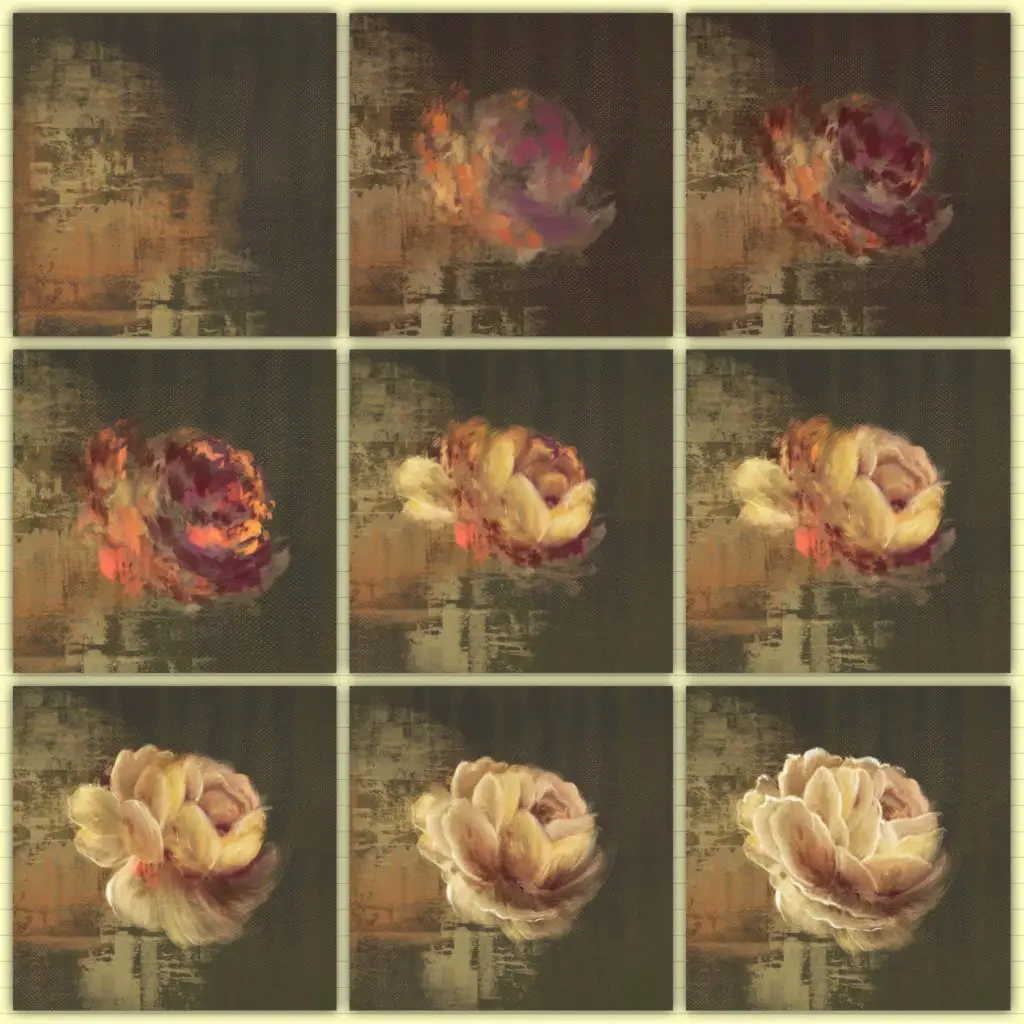
Once you have laid down these background shades, you can use a small oil brush to start dabbing on petals, keeping them loose and apart from each other to begin with. You don’t need to worry about the details at this point, as you are just starting to add them to fill out later with more artful brushstrokes. The shape of petals change based on the angle, being more oval-shaped and circular towards the front and back and more angular and pointed to either side.
Once you have the basic shapes dotted in, you can begin painting the larger shapes using a light brush in a dusty yellow, beginning to outline the outer leaves first and leaving room for the centre of the flower. The outer ring of petals is spread out widely, with the middle petals being the widest and most evenly spaced, with the innermost rings of petals being so tightly spaced that they appear from the outside like scales overlaid together.
When layering these petals in, make sure to use a variety of shades of yellow, from a muted, earthy yellow to a buttery, dandelion yellow shade, especially towards the edges of the petal, so that the inner shade is a darker yellow and a the outline is a brighter colour, capturing the natural light. Throughout this process, continue to add in shades of brown and red, especially at the inner pistil of the flower and at the connections between the petals, where the petals meet one another or grow outward from the stem.
Once you have the basic shape, size, and colour of the flower in place, you can move on to adding depth to the painting through adding details in numerous coats of paint. In traditional oil painting, numerous layers are used because each individual coat is very translucent when taken on its own, meaning that many layers are required to create a complete piece, and also that detail, warmth, depth, and subtlety is adorned using the translucent individual layers.
When viewing an oil painting in the right light, one can see the shades all the way to the surface of the canvas, without necessarily knowing that it what they’re seeing. When one sees blush on the cheeks of a portrait, one might actually be seeing the deepest pink layer of the canvas, rather than something added to the outermost layer. When painting digitally, light and texture have to be modulated in order to mimic their real life counterparts, and a good way to achieve this is to paint many layers using small brushes at partial opacity.
Now that the petals are in place, you should paint over them, outlining in yellow, and adding brushstrokes of warm, red-tinted browns and delicate pinks, incorporating the smudge tool regularly to blend the strokes together, as would be done with wet paint on a canvas.
The more layers you add, the finer the details you can add to the flower. Once you have all of the flower petals painted and the cabbage-like design in place, you should outline fine details in a yellow so light that it is near white, adding structure and contrast to the tips of the petals and the edges of the flower, creating the illusion of light and borders.
With all of this complete, you are left with a flower that is nearly finished, and can move on to painting the stem and branches using an olive greenish-brown to create the structure and outline, leaving basic shapes in place for the addition of smaller flowers and leaves. As you paint in the leaves, leave room for the addition of further detail and use a similar green colour, so accentuate the shape of the brushstrokes further and replicate the reflective layer that most plant leaves have.
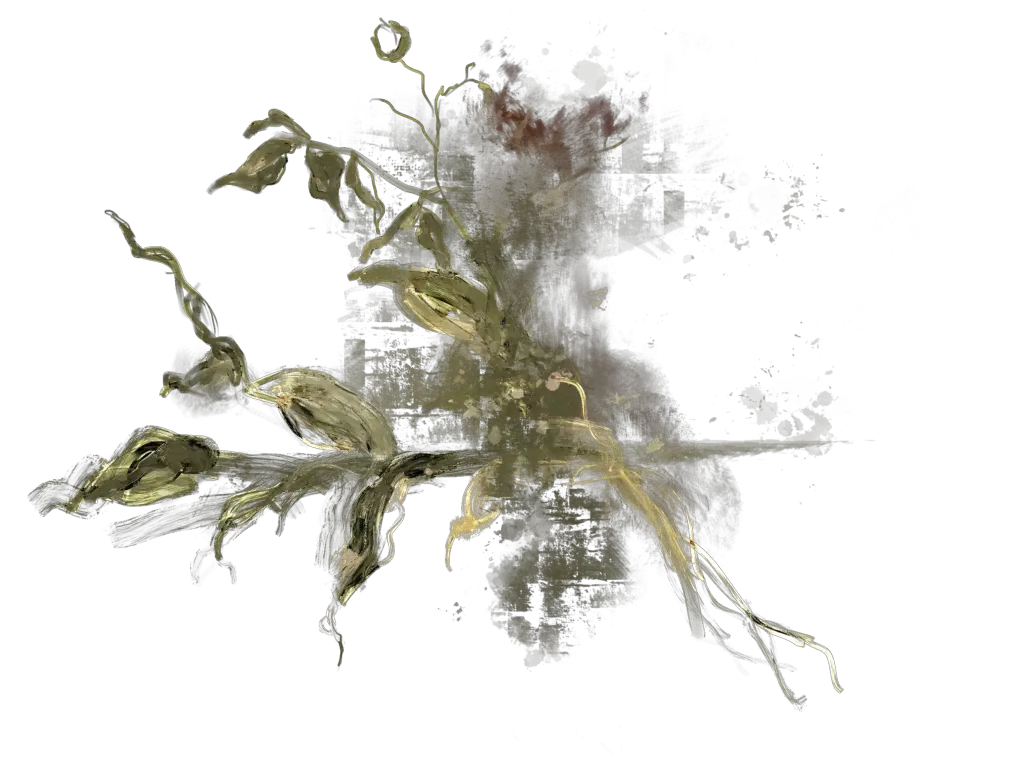
When adding smaller flowers, follow the same structure as described above, though you can try to use different base colours, like pink and brown as opposed to shades of yellow, and feel free to use a more freehand, looser method for smaller flowers, since there will be less detail visible.
Adding flower buds to the branch using splatters and dots of colour will add a naturalistic effect, and finishing off the piece by continuing to add detail to the branch and leaves will give the impression that the flowers are one part of a plant, rather than existing sans context.
You can add detail to the branch while still retaining a simple, minimalist style by adding leaves of darker, more matte colour to represent the leaves that do not catch the light as much, and by outlining the whole branch and leaf structure with yellow-white to add structure and light.
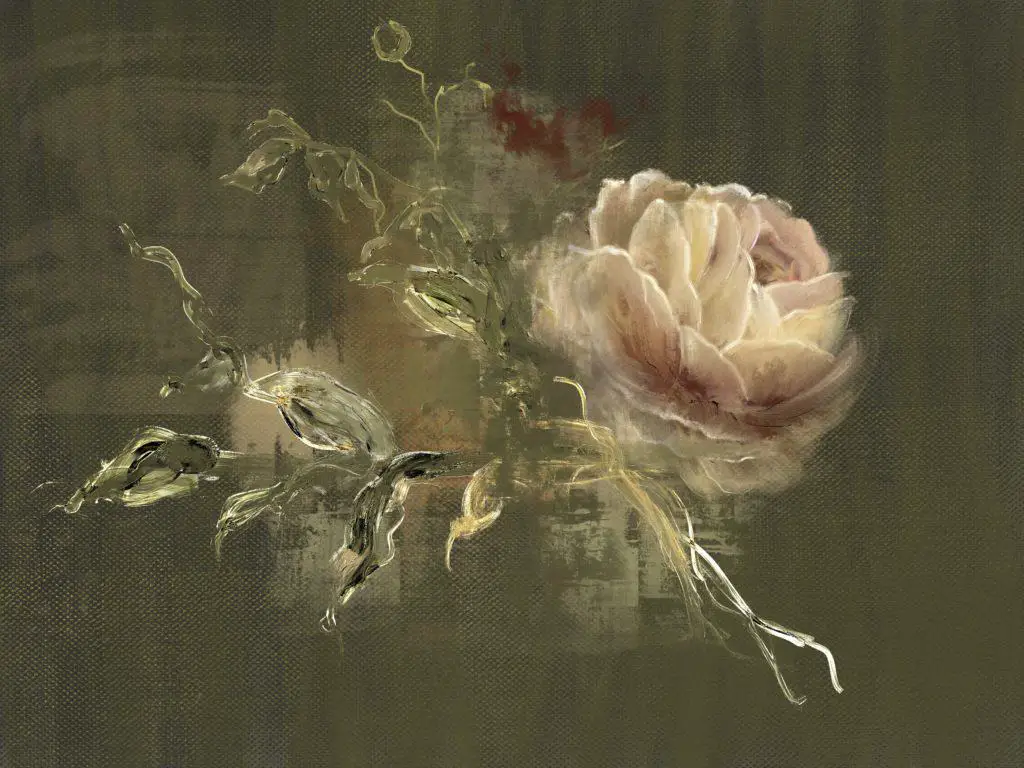
With this method, you should end up with a branch dotted with full, blossoming roses that incorporate the tenets of traditional oil painting in Procreate, and simultaneously still leave room for your own style and colour choices to shine through, regardless of what background of painting you have and what experience you are coming to the painting canvas with.
More Procreate Tutorials….
- How To Paint A Realistic Watercolour Hydrangea Flower (In Procreate)
 Learn to paint this realistic watercolour hydrangea in this step by step tutorial and time-lapse video. This painting was produced in Procreate, but the same method detailed below can be used in any digital art program or even with traditional watercolour painting. Hydrangea are complex flowers, with each petal being an individual flower with petals and pistil portion, and grow in a variety of colours based on the acidity and nutrients in the soil they grow in. The petals shown in this watercolour hydrangea flower are a gradient representation of some of the many colours these flowers can be in …
 - Step by Step Tutorial: How To Draw & Paint A Cute Whimsical Robin (With Procreate Default Brushes)
 Here is a quick step by step tutorial on how to draw and paint a cute whimsical robin. For this illustration, I used the Procreate app with the default pre-installed Procreate brushes. (Whilst this tutorial is a Procreate one, you may use the same instructions to use with traditional paper and watercolour/acrylic paints – if you don’t have or want to use Procreate.) I used the following reference photo: So let’s get started! 🙂 How To Draw A Robin Go over your sketch once again with the darker pencil, finalising the details as you go. Painting In The Robin & …
 - Step-by-Step Botanical Illustration Of A Peach Rose (In Procreate)
 The natural world has given us so many ways to create a beautiful piece of art, but one of my favourites is through the use of light and shadow. It is such a creative way to show depth in your painting, and amazingly enough, it can be achieved through the muted colours of pink and peach. This step-by-step watercolour painting tutorial will guide you through the process of creating a beautiful peach rose, from start to finish. I will even show you some cool features that are included in Procreate such as the use of brushes and layers. So, if …
 - Step By Step Botanical Illustration Of A Watercolour Vintage Rose (In Procreate)
 There’s no doubt that roses are one of the most beautiful flowers in the world, making them also one of the most popular botanicals to draw and paint. Styles amongst botanical artists vary from simple and loose to more detailed and realistic. Then there is also the style used by the old masters, which are an all time classic loved by all – the vintage style roses. This step-by-step watercolour painting tutorial will guide you through the process of creating a vintage rose in Procreate, from start to finish. So, if you’re a beginner or somehow lost on where to …
 - Step by Step Botanical Illustration Of A Fading Rose Branch With Blue Butterfly (In Procreate)
 Taking a butterfly on a faded flower as my subject allows me to explore many aspects of drawing and painting. Firstly the position of the various elements, the leaves, the flowers and the butterfly along the branch allows the viewer’s eye to run from one side of the painting to the other. The colour palette can also be explored with each element subject to different hues and ranges. And lastly, there is a contrast between the way each element is approached, the relatively flat leaves, the more detailed and complex flowers and the contrasting colours of the butterfly itself. A …
 - Creating Art in Procreate, Your Digital Sketchpad
 One of the most popular programs for creating digital art available in the current market is Procreate, a program specifically designed to recreate as much of the traditional art experience as possible. While also taking on the many benefits that come with digital art, such as a multiple layer system, much like Photoshop, and the ability to tweak saturation and colour palettes in ways that aren’t possible in traditional painting. Nevertheless, it can be a common refrain when mentioning Procreate that it is difficult to learn – which isn’t necessarily true. Like all programs, for art or otherwise, learning the …
 - Step By Step Tutorial: Oil Painting Roses (In Procreate)
 Painting roses in Procreate in the style of oil paints can be a simple process, and not too different to the traditional form of oil painting. Roses are made up of simple geometric shapes, arranged in repeating patterns and depicted with enough variety and difference from layer to layer to still come across as natural and appealing to the eye. By following this simple guide, you should be able to paint roses in Procreate in such a way that’ll look artistic and natural, while maintaining the appearance of oil painting. Tools: Painting Tutorial To begin, start by laying out a …
 - Step By Step Botanical Illustration Of Rustic Peach Roses (In Procreate)
 Peach roses are so pleasing to the eye as they bring the sweet, floral scents of blooming rose gardens to mind every time we start painting them 🙂. They are known to symbolise sincerity and gratitude. A painting of a peach rose held within an antique frame, would make a very thoughtful gift to someone who has shown you kindness. Tools: 1. Sketch Of The Rose After opening Procreate and selecting a “Sketching” brush, the first step is to make a faint rough sketch of the rose starting from the inner, then middle and eventually the outer petals. I used the …