There’s no doubt that roses are one of the most beautiful flowers in the world, making them also one of the most popular botanicals to draw and paint. Styles amongst botanical artists vary from simple and loose to more detailed and realistic. Then there is also the style used by the old masters, which are an all time classic loved by all – the vintage style roses.

This step-by-step watercolour painting tutorial will guide you through the process of creating a vintage rose in Procreate, from start to finish. So, if you’re a beginner or somehow lost on where to start, I hope you enjoy it and find this useful.
Tools
- Procreate watercolour paintbrush. You can use any watercolour paintbrush that you wish. I used this paintbrush and canvas set from Creative Market for this artwork:
- Procreate sketch pencil
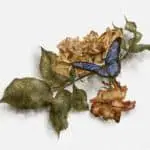
Watercolour Painting Of A Vintage Rose
I will be using this photo of a pink rose picked from my garden as my reference for this tutorial. If you’re using your reference, make sure to have it handy so you can follow along.

Open up Procreate on your iPad (or other Apple device). If this is your first time using the app, you will be prompted to create a new document.
This layer can be your ‘compass’ layer as it is from here you will need to make your layout of the direction and positioning of the rose flower and leaves.

Add a new layer. Using the “Main Brush”, make a circle and also a darker inner circle, as shown in the image below, and in a colour of your choice. I have used a burgundy kind of shade.

Using a white colour, follow the strokes as shown in your reference photo as I have done below in the step-by-step images below – these strokes will eventually show the petal outline and depth of the rose. Use the “Main Brush” to give an outline of the petals, and use the “Blender Brush” or Smudge Tool to give it it’s 3D spherical appearance.

The white lines are made using the “Main Brush” and the “Blender Brush” or Smudge Tool is used to blend the white into the burgundy – this is done for each petal.
You may need to go over each petal with more white repeatedly to subtly strengthen the white colour.

The same brushes are used for the green leaves.
You can choose to finish off the rose with a bit of splatter dots 🙂

If you wish to use an outline first, you can use this below:
Hope you enjoyed this tutorial – please let us know in the comments below! 🙂